Observers
As seen before, it is possible to navigate among the things with the platform (see Tree editor). It is also possible to filter them according to some regular expression on their name and/or description.
We introduced the notion of Observer to allow to associate things of different types: for instance, to be able to retrieve the trucks and the clients of a company at the same time which allows to show them together in the map. As shown below, observers make also possible to filter with criteria on other fields that can be numerical, string, boolean and datetime.
More advanced constraints are available on the location and proximity area fields of the things. It is also possible to define criteria on aggregations of the things' snapshots.
Contents
Create observer workflow
Set observer name
Select thing type(s) or Observation type
- Depends on observer type
Define logic criteria
- Depends on types semantics
Execute it
- Depends on observer type. It might need an observation instance to execute.
Handling observers
Observers creation and loading
First thing to do is to open the observer's editor:
- The observer editor will appear over the navigator with its own menu bar on top of the page and another menu in the right side.
- When there is no observer loaded, the editor menu will look like
- Finally, the observer editor top menu will appear
Deletion and unloading
Click on ![]() to delete the currently loaded observer or just unload it by using the
to delete the currently loaded observer or just unload it by using the ![]() . The editor will return to its initial state:
. The editor will return to its initial state: ![]()
Also, if the observer was executed, and thus the things filtered, the editor will return the list of thing instances that matched the criteria
Adding/Removing thing types
In order to show things of different types at the same time you must load or create an observer. The thing types can be chosen with the button ![]() and once a type is selected the menu in the right will be updated
and once a type is selected the menu in the right will be updated
For instance, let us suppose we want to see all the Trucks and the endCustomers of a company. We click on the button once to select type Truck and once to select endCustomers.Then you can save the observer by clicking on buttonand the observer editor will look like this
Execute the observer with button
and the list of things will contain all the trucks and endCustomers the user has access to.
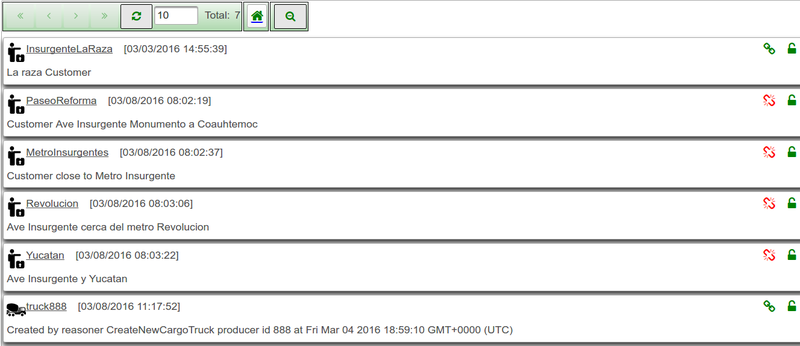
If a chosen thing type is no longer needed and it is wanted to be removed from the list, go to the right side menu, click on the thing type submenu and then click on the last option at the bottom ![]()
Note: Do not forget to save the observer if you want to keep your changes. If you execute it, a dialog window will allow you to save it or cancel the operation.
Execute observers
Once the constraints are set (see Filter criteria section below), it is possible to execute it in order to search the things satisfying the given criteria. To do that just click on execute button ![]() . After a successful execution, the tree editor will show only the things satisfying the criteria. Also, once an observer is executed, it is set as active observer for any time you navigate to the things collection (/amtech/things/entities or /amtech/things/entities/<thingType> where <thingType> is an already defined type of thing). In order to remove this active observer click on the blue observer button on the floating menu
. After a successful execution, the tree editor will show only the things satisfying the criteria. Also, once an observer is executed, it is set as active observer for any time you navigate to the things collection (/amtech/things/entities or /amtech/things/entities/<thingType> where <thingType> is an already defined type of thing). In order to remove this active observer click on the blue observer button on the floating menu
![]()
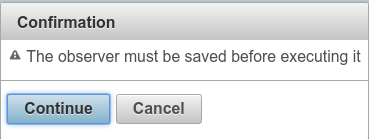
Note: Observer execution requires to save the Observer. If there are modifications that have not yet been saved, a dialog box will to if you want to save the observer first.
If it is clicked on Cancel, nothing will be done but if you accept to continue, then the observer will be saved and then executed.
Note: As it is explained below, for activity observers, it is asked for the observation instance just before the execution.
Filter criteria
An observer allows filtering things based on criteria applied to its fields. The operators to be used depend on the type of the field. The values to compare to can be explicitly defined, or can be references to values taken from the incoming observation in the case of Activity Observers.
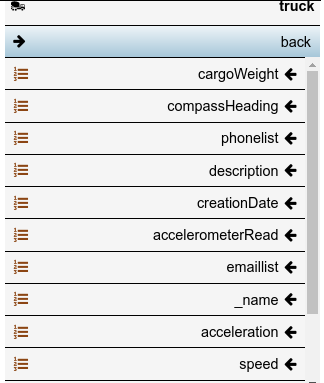
In the UI, inside an observer, once a thing type is selected on the right-side menu, the list of fields that allow constraints will appear.
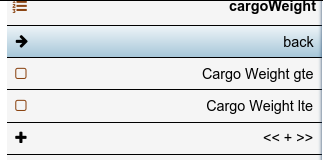
Choosing a field will show all the available criteria for this field
Then, click on one of the options to show the constraint editor in the center of the screen, below the observer menu. Set the constraint parameters in the corresponding spaces.
It is also possible to enable/disable a given constraint by unchecking the ![]() at the left of the field name.
at the left of the field name.
Note: All the constraints that are unchecked will be ignored in the saving process. However, their parameter values will stand in the client while the editor is active.
The constraint list will depend on the type of the field as it will be shown below. There are several basic constraints that correspond to base field types (numerical, text, datetime and boolean). There are also some advanced constraints and constraints on aggregation functions.
Basic constraints
The basic constraints correspond to the primitive field types
- numeric (long, integer and double)
- lte - lower than or equal
- gte - greater than or equal
- text
- regex - matches a regular expression
- eq - equals
- datetime
- lte - lower than or equal
- gte - greater than or equal
- boolean
- eq - equals
For all operators, values can be explicit or binded to values from the incoming observation
In order to edit a constraint, you should navigate on the right side menu from the thing type, to the field id and then to the constraint. The constraint caption will be the caption of the field and the operator which will be one of lte, gte, eq, etc.
Once you click on the corresponding menu,
Note: There is a special case for the field @id which contains the uri where the only constraint allowed is the equality and the caption of the constraint will be Uri
Advanced constraints
Our observers allow constraints for two special types: spatial or location and proximity area field.
Spatial fields
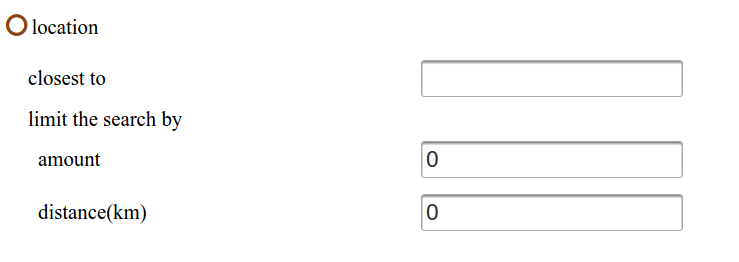
There are 4 constraints on the spatial field location of the resources: three correspond to spatial relation operators Within, Contains and Intersects and the other one is to find the closest resources. All of them depend on a given geometry that can be edited by the map or written directly in the constraint input box. Note that, when one of this constraints is selected, the map edition is enabled and the status is set to
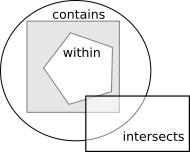
The contraints based on spatial relations are shown below according to a given gray rectangle:
- Within: accepts only those things which are within (or contained by) a given geometry (e.g. pentagon)
- Contains: accepts only those things containing a given geometry (e.g. circle).
- Intersects: accepts only those things which intersects the given geometry (e.g. white rectangle)
Note: At the moment, when the given geometry is not a point, the Contains filter searches for resources whose locations intersect it and thus it could return some that do not contain the given geometry. It is not the case when the geometry is a point because, in this case, Intersects and Contains become equivalents.
The other contraint allows to find the closest resources to a given point. When the given geometry is not a point, the center of the bounding rectangle is used. This constraint accept also two parameters to limit the vertices to retrieve: amount and maximum distance to the point. In both cases, the value 0 allows to remove the limits
Proximity area fields
The other special constraint represent a filter on the field proximity area. This constraint is called "with ancestor" according to the parent-child relation analogy explained here. Given a thing, it allows to filter those resources having it or one of its descendants as proximity area.
The desired ancestor can be chosen with the ![]() or it is possible to write the id directly in the input box.
or it is possible to write the id directly in the input box.
Consider the example of the shopping centerLet us suppose that every customer of the shopping center has its proximity area pointing to the business closest to its position by some sensors placed around the mall. So, for an observer returning customers, - if you choose a business id as ancestor, you will have in return all the customers that were detected the last time near (or inside) that business. - if you choose the level id as ancestor, you will have all the customers in that floor because they will be at a business having that level id as proximity area - if you choose Shopping center as ancestor, you will have all the customers having one of its business as proximity area, this means all the business pointing to a level which points to the shopping center
Unsupported field types
The fields that are links to other things or collection of things, do not allow to add filter criteria so they are not shown in the editor fields menu. Also, constraints on image and floorplan fields are not supported
Aggregation functions
As described in Thing semantic, each property of a thing type can be configured to keep track of several old values or snapshots which allow to see different versions of a given instance. It is possible to include constraints according to some aggregation functions on those snapshots:
- maximum
- minimum
- average
- count
- sum
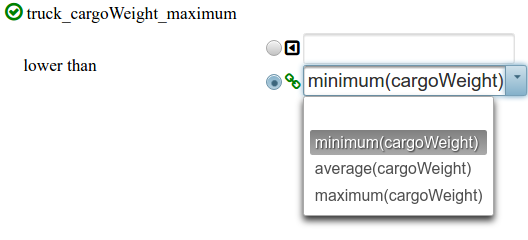
For instance, it is possible to search all the trucks where their maximum cargo Weight is smaller than some given amount.
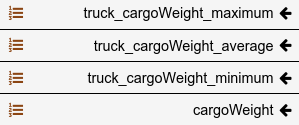
The idea here is to define new dependent fields that will hold the result of the aggregation functions on the instance field snapshots. For that, select, on the left menu, the field on which it is wanted to define the aggregations and click on ![]()
Then select the aggregation functions you want to compute on each instance snapshot:
and click on the accept button ![]()
The newly defined fields will be included in the left menu to be used as any other field
These fields can be now used as any other to define new constraints
However, note that there are some changes in the constraint editor. Since the dependent fields can be used as parameter to other constraints of a field with the same value type, we allow to bind the new field as parameter to a constraint on another dependent field or on a regular field
Observers for activities
In some cases, see Activities section, it is useful to make the observer dependent to some external (dynamic) data. This platform allows to define observers depending on an observation so the constraint parameters can be bound to the observation fields. In this section we will explain the specificity of the observers for activities. Their main differences with those explained above are:
- Activity observers require an observation to be executed
- Activity observers allow none or only one type of thing. For this reason, the thing type button will be hidden when there is one thing type selected
- When executed in the creator sandbox, they will show only things that belong to the creator active tenant
Selecting/Removing observation type
It is needed to specify the type of observation that the observer will treat. To do that, click on the observation button ![]() and select the observation type in the opened dialog. The observer menu will change to
and select the observation type in the opened dialog. The observer menu will change to
Also, there will be another entry on the left side menu with the selected observation type which will allow to define constraints on the observation as explained below.
Filters on observation fields
The criteria on observation type fields are similar to those on the thing properties explained in section above, however some kind of constraints are not allowed (like proximity area based constraint) and a new one isRequired is included to ensure that the observation instance contains a given field.
Binding properties
Activity observers allow also that the constraint parameters depend on observation fields. This process is called binding and it follows the same idea than for aggregation based fields described above.
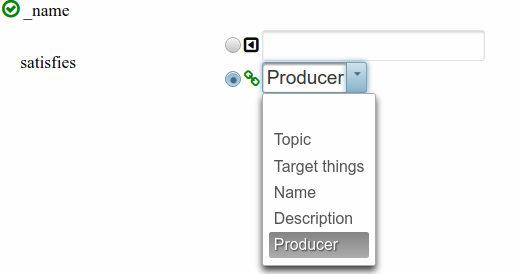
In this case, the constraint editor will change for each parameter of the constraint according to the fields of the observation type: for instance, numerical parameters allow only bindings to numerical fields of the observations:
Note: Whenever there is no observation fields of a compatible type, the editor will not show the binding option.
Use of observation target things
An observer that runs using an observation instance may use the target things specified in it. This option allows to specify thing IDs to filter by. When the observer runs in this mode,
- if the thing type of the observer is included in the target things, a filter is dynamically added to it to filter things by name, using the IDs specified in the target things for the thing type
- the filter for target things IDs is applied along with the rest of the filters of the observer
- if the thing type of the observer is not included in the target things no extra filter is added
Observers API
See IoT_Restful_API#Observers_API
Security in the execution of observers
See Access control#Access while executing observers in the reasoner's engine


