Difference between revisions of "Edge Configuration"
(→Home) |
(→Wio) |
||
| (10 intermediate revisions by 2 users not shown) | |||
| Line 70: | Line 70: | ||
* The wireless interface is configured as an AP with SSID <code>amtech-pi</code>. You can connect your computer to this wireless network by using the passphrase <code>freepass</code> and then use the address 172.20.10.1 to connect to the PI. | * The wireless interface is configured as an AP with SSID <code>amtech-pi</code>. You can connect your computer to this wireless network by using the passphrase <code>freepass</code> and then use the address 172.20.10.1 to connect to the PI. | ||
=== General === | === General === | ||
| − | [[File:m2mbridge console - general.png|950px||thumbnail|center| | + | In this page you will be presented with general information about the M2MBridge, including: |
| + | |||
| + | * Host name | ||
| + | * MAC address | ||
| + | * IP addresses | ||
| + | |||
| + | You will also be able to customize the host name if you click on the name and assign a new one. | ||
| + | [[File:m2mbridge console - general.png|950px||thumbnail|center|General]] | ||
===Bridge Configuration=== | ===Bridge Configuration=== | ||
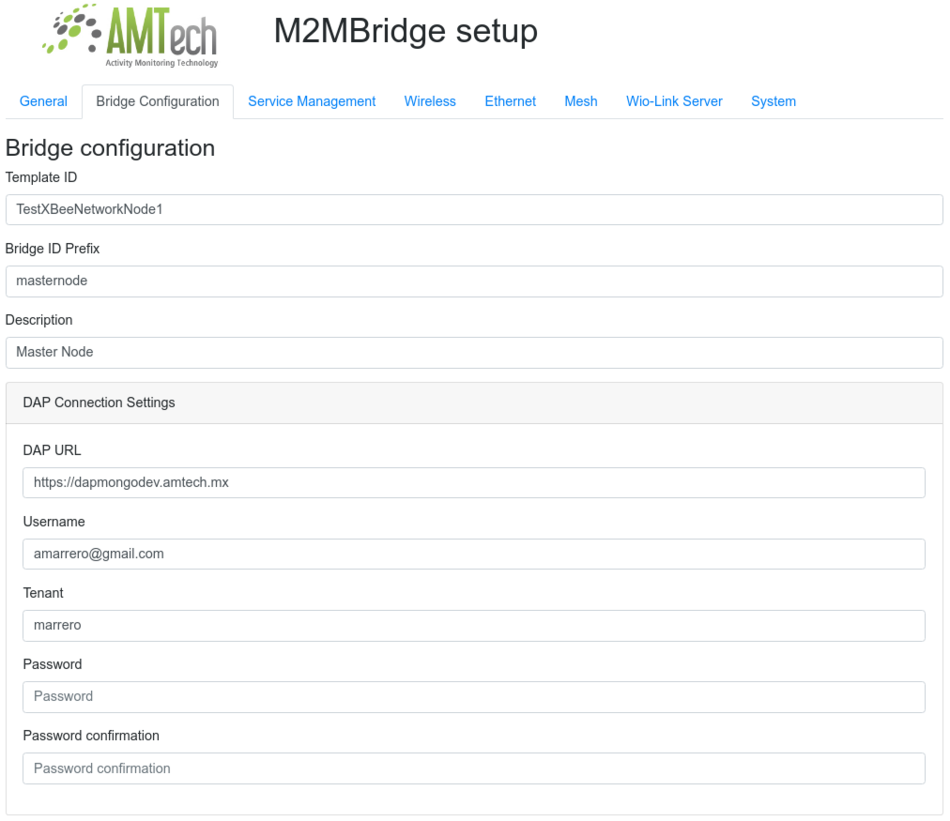
| − | [[File: | + | In this page you will configure the execution of your M2MBridge. Each setting was already explained in [[Edge_Configuration#Editing_bridgeConfig.json|this section]]. |
| − | [[File: | + | [[File:m2mbridge console - configuration - general and dap connection settings.png|950px||thumbnail|center|Bridge configuration]] |
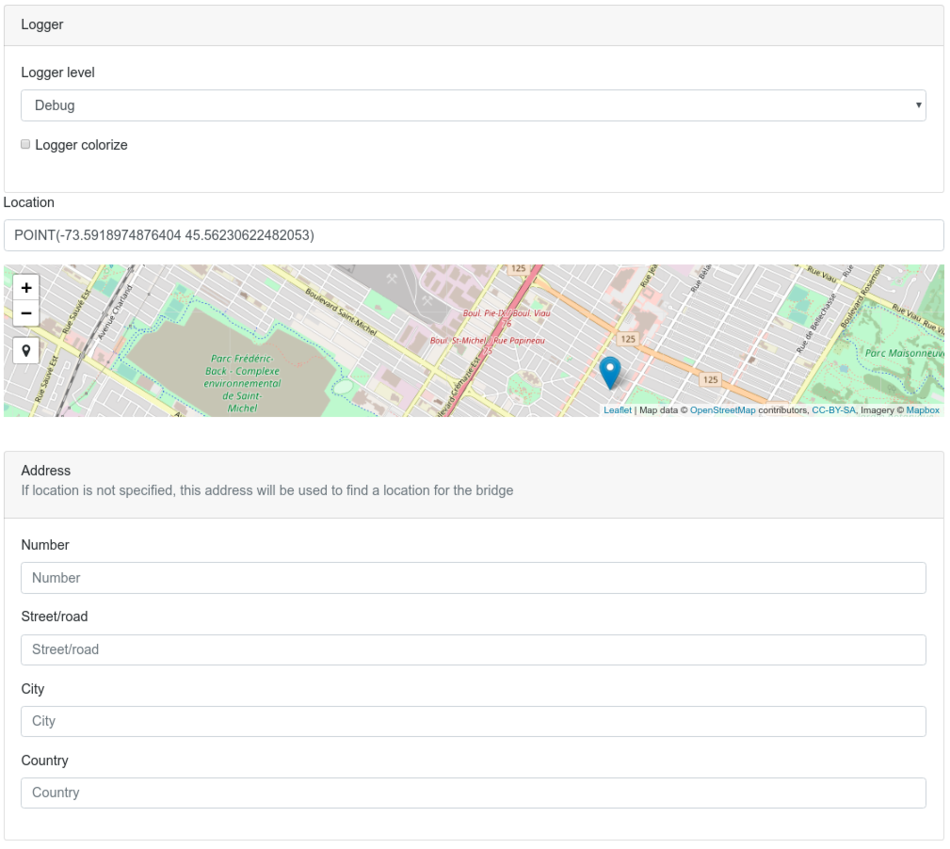
| − | [[File: | + | [[File:m2mbridge console - configuration - logger and location.png|950px||thumbnail|center|Logger and location]] |
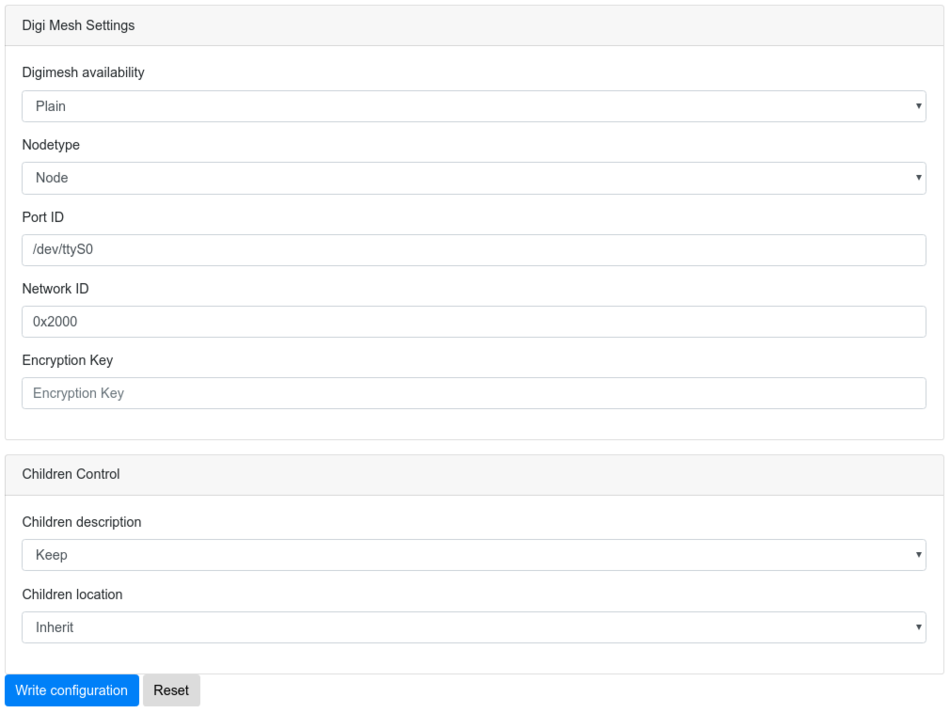
| + | [[File:m2mbridge console - configuration - mesh and children creation control.png|950px||thumbnail|center|Mesh network and children creation control]] | ||
===Service Management=== | ===Service Management=== | ||
| Line 90: | Line 98: | ||
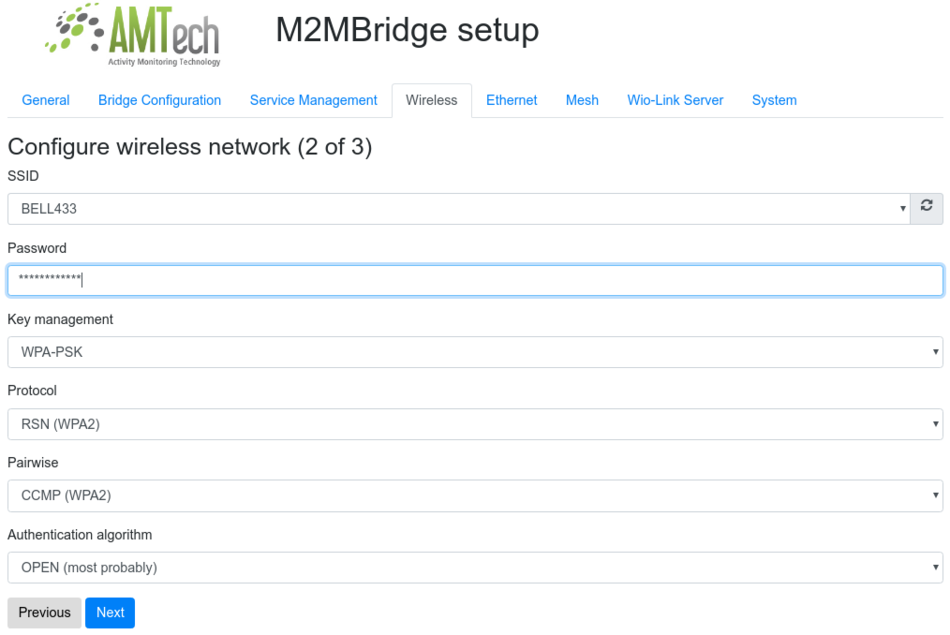
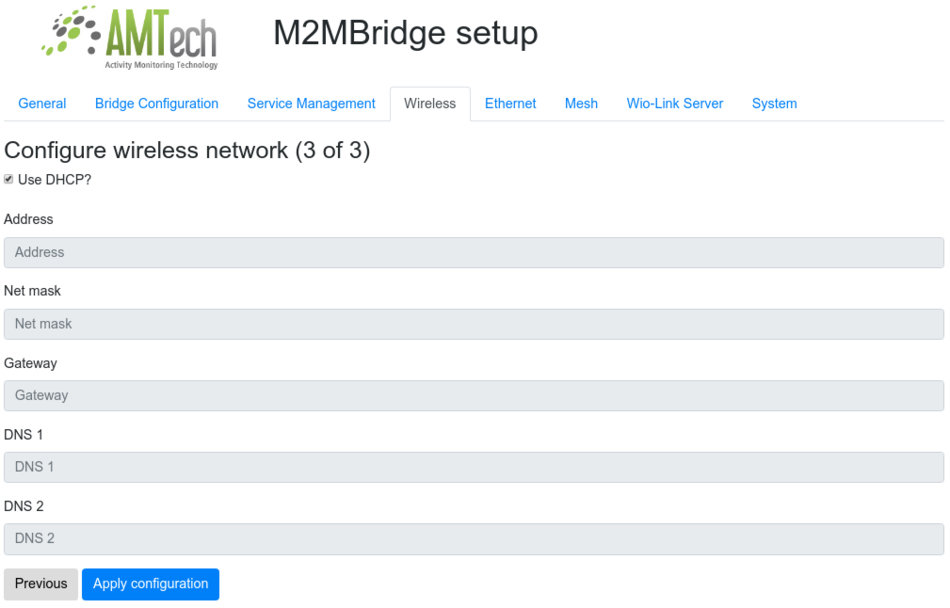
Throw this wizard you can configure the WIFI interface of the raspberry PI where the M2MBridge is running. You will be able to set the usual configuration options for a wireless network. | Throw this wizard you can configure the WIFI interface of the raspberry PI where the M2MBridge is running. You will be able to set the usual configuration options for a wireless network. | ||
| − | [[File: | + | [[File:m2mbridge console - wireless 1.png|950px||thumbnail|center|Device selection]] |
| + | [[File:m2mbridge console - wireless 2.png|950px||thumbnail|center|Wireless network and connection settings]] | ||
| + | [[File:m2mbridge console - wireless 3.png|950px||thumbnail|center|IP configuration]] | ||
===Ethernet Network Configuration=== | ===Ethernet Network Configuration=== | ||
| Line 103: | Line 113: | ||
[[File:bc-mesh.png|950px||thumbnail|center|Ethernet Network Configuration]] | [[File:bc-mesh.png|950px||thumbnail|center|Ethernet Network Configuration]] | ||
| + | |||
| + | === Wio === | ||
| + | Through this page you will be controlling the Wio Server service and you will also be able to inspect the Wio Link/Node devices connected and configured. You can find more about configuring Wio Link/Node devices in [[Configuring Wio Link/Node devices|this section]]. | ||
| + | |||
| + | The first time you visit this page you will only see a "Start service" button that will allow you to enable the Wio Server service. | ||
| + | [[File:bc-wio-server-stopped.png|950px||thumbnail|center|Wio server default view]] | ||
| + | |||
| + | Once you start the service you will see that the service is started but still you need top configure your Wio Link/Node devices pointing to this Wio Server. You can find more information about this configuration [[Configuring Wio Link/Node devices|here]]. | ||
| + | [[File:bc-wio-server-started-no-device.png|950px||thumbnail|center|Wio server started but no Wio Link/Node device added]] | ||
| + | |||
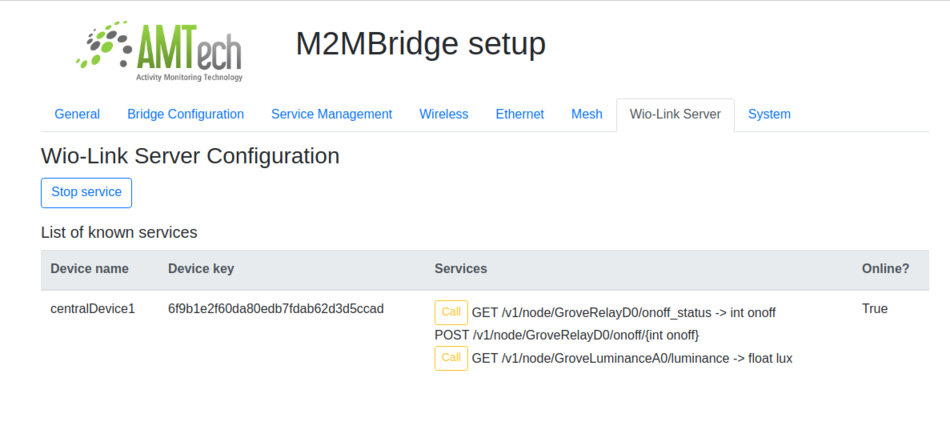
| + | After you have added one or more Wio Link/Node devices you will be able to check the API that is exposed by the already added sensors. | ||
| + | [[File:bc-wioServer.png|950px||thumbnail|center|Wio server is started and a Wio Node has already been added]] | ||
| + | |||
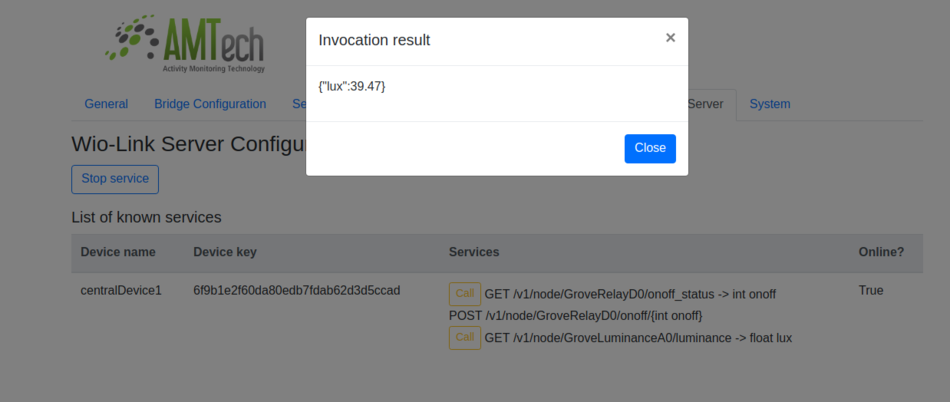
| + | Through this page you can call the Restful API exposed by Grove sensors and devices allowing the validation of device's configuration and physical connections. | ||
| + | [[File:bc-wioNodeCall.png|950px||thumbnail|center|Example of invocation]] | ||
| + | |||
| + | ===System=== | ||
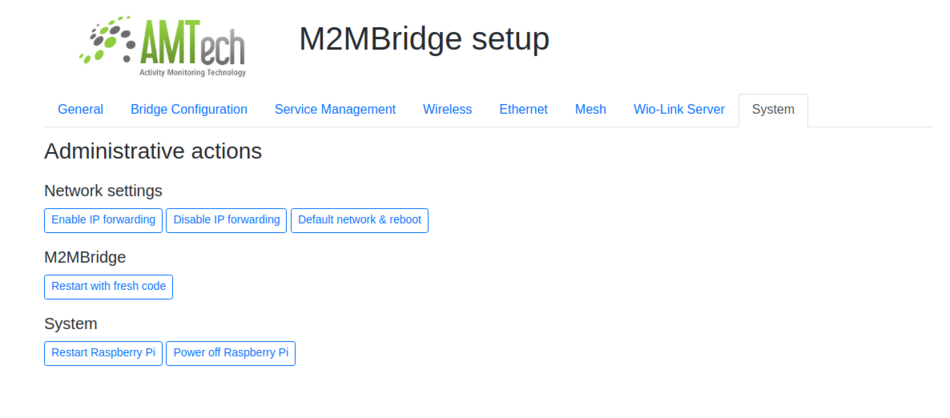
| + | This section exposes several core system fucntions | ||
| + | [[File:bc-system.png|950px||thumbnail|center|Ethernet Network Configuration]] | ||
==Configuration validation== | ==Configuration validation== | ||
*At startup time the M2MBridge validates its configuration with the cloud. If there is an error, the application aborts | *At startup time the M2MBridge validates its configuration with the cloud. If there is an error, the application aborts | ||
*To simplify the process of validation configuration there is an option to validate the configuration for a M2MBridge instance (See [[Validation|here]]) | *To simplify the process of validation configuration there is an option to validate the configuration for a M2MBridge instance (See [[Validation|here]]) | ||
Latest revision as of 13:52, 7 August 2018
For details on Edge see Edge M2MBridge Configuration can be achieved in 2 ways
Contents
Editing bridgeConfig.json
It is located at /opt/M2MBridge directory.
Configuration is based on cloning. Referencing an M2MBridge instance as a template; its configuration will be cloned. The objective is to have a single configuration that can then be used to create and maintain multiples deployments. The template is described through a template id and prefix. Other configuration options are described below:
- description Text to be assigned to M2MBridges description property. Type: string.
- dap DAP connection options. Type: JSON, having:
- dapUrl AMTech IoT DAP URL. Type: string, valid URL
- userId Bridge instance user ID. Type: string.
- tenant Bridge tenant. Type: string.
- password Bridge password. Type: string.
- Note: You should use an invited follower in the authentication. See remarks in this section
- templateId Bridge instance ID to be cloned. Type: string, valid bridge name.
- bridgeIdPrefix Prefix to add to the unique M2MBridge identifier, the MAC address of the device is used as unique ID. In the absence of a prefix, just the MAC address is used as identifier. Type: string.
- location WKT location to set to the M2MBridge location. Overrides address if also present. Type: stringified version of JSON representing the WKT.
- address Address to be used to guess M2MBridge location. Type: JSON.
- digiMesh DIGI Mesh options. Type: JSON, having:
- availability To indicate if a DIGI mesh network should be made available. Type: enum. Possible values: none, plain, encrypted
- nodeType To indicate if this is a master or a node. Type: enum. Possible values: master, node
- portID Path to port ID. Example:
/dev/ttyUSB0. Type: string - networkID Network ID of DIGI Mesh Net that should be shared among all the nodes in one mesh network. Type: string representing an hexadecimal value between 0x0000 and 0x7FFF
- encryptionKey If encryption is available this should contain a string of 32 hexadecimal characters. Type: string
- children Controls what policy to follow at assign certain properties to M2MBridge's linked things.
- description Specifies whether the description property of linked things should inherit the description property of the bridge it belongs to (inherit) or keep its own default value (keep). Type: enum. Possible values: keep, inherit
- location Specifies how to set the location property of linked things (type: enum, possible values: keep, inherit, relative):
- keep to keep its own default value given in the used template resources,
- inherit to inherit the location property of the bridge it belongs to,
- relative to adapt their location to the new bridge position keeping its original geometry. The location of the bridge template and that given in the configuration are used to compute how to move the thing's geometry to compute the final location.
- Note: Whenever the location option is set to relative or inherit, the calibration of the floorplan and other calibrated images are computed like in the relative option described above.
bridgeConfig.json example
{
    "description": "AMTech M2M Bridge",
    "dap":{
        "dapUrl": "https://dap.amtech.mx",
        "userId": "xxxxxxx@amtech.mx",
        "tenant" : "xxxxxxx",
        "password" :"xxxxxxxx"
    },
    "templateId":"m2mCreator:m2mBridge",
    "bridgeIdPrefix":"tienda1",
    "location": "{\"wkt\":\"POINT(-99.17125583 19.40501031)\",\"sContext\":\"geo\"}",
    "address" :{
        "country" : "usa",
        "city": "Las Vegas",
        "road": "Las Vegas Boulevard South",
        "number":"3960"
    },
    "digiMesh": {
        "networkID": "0x2017",
        "portID": "/dev/ttyUSB0",
        "nodeType": "node",
        "availability": "encrypted",
        "encryptionKey": "1234567890abcdef1234567890abcdef"
    },
    "children": {
        "description": "keep",
        "location": "inherit"
    }
}
Using the M2MBridge Web Configurator
You can reach the interface through the URL http://<address of your pi>/ to start configuring the PI.
The image provided for the Raspberry PI comes with the following default configuration:
- The wired interface is configured to acquire an IP address through DHCP. So you can connect it to a wired network where there is a DHCP present and try to guess the assigned IP. For instance, by inspecting the leases of the DHCP service.
- The wireless interface is configured as an AP with SSID
amtech-pi. You can connect your computer to this wireless network by using the passphrasefreepassand then use the address 172.20.10.1 to connect to the PI.
General
In this page you will be presented with general information about the M2MBridge, including:
- Host name
- MAC address
- IP addresses
You will also be able to customize the host name if you click on the name and assign a new one.
Bridge Configuration
In this page you will configure the execution of your M2MBridge. Each setting was already explained in this section.
Service Management
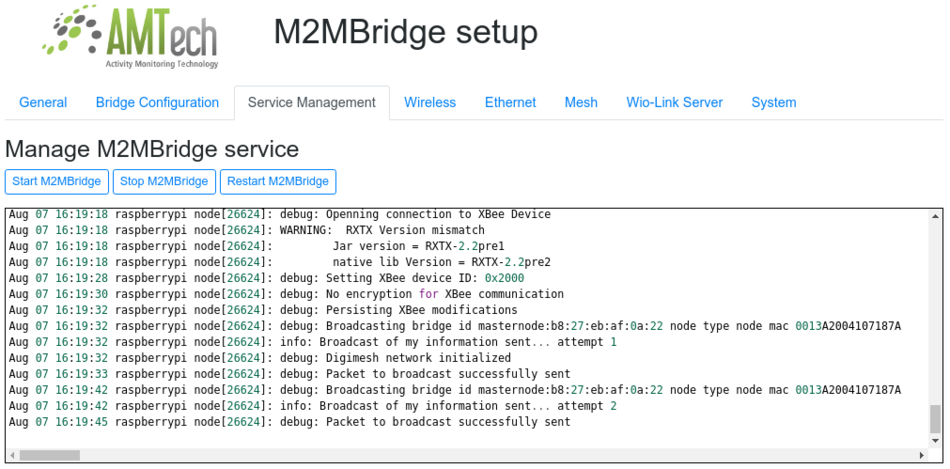
In this window there are several actions that operate on the M2MBridge daemon service. They allow you to start, stop or restart the server.
Last lines from the M2MBridge daemon log will be shown in the editor as they happen in the device.
If you go to this window before configuring the M2MBridge you will find that an error is shown regarding the need of a configuration.
Wireless Network Configuration
Throw this wizard you can configure the WIFI interface of the raspberry PI where the M2MBridge is running. You will be able to set the usual configuration options for a wireless network.
Ethernet Network Configuration
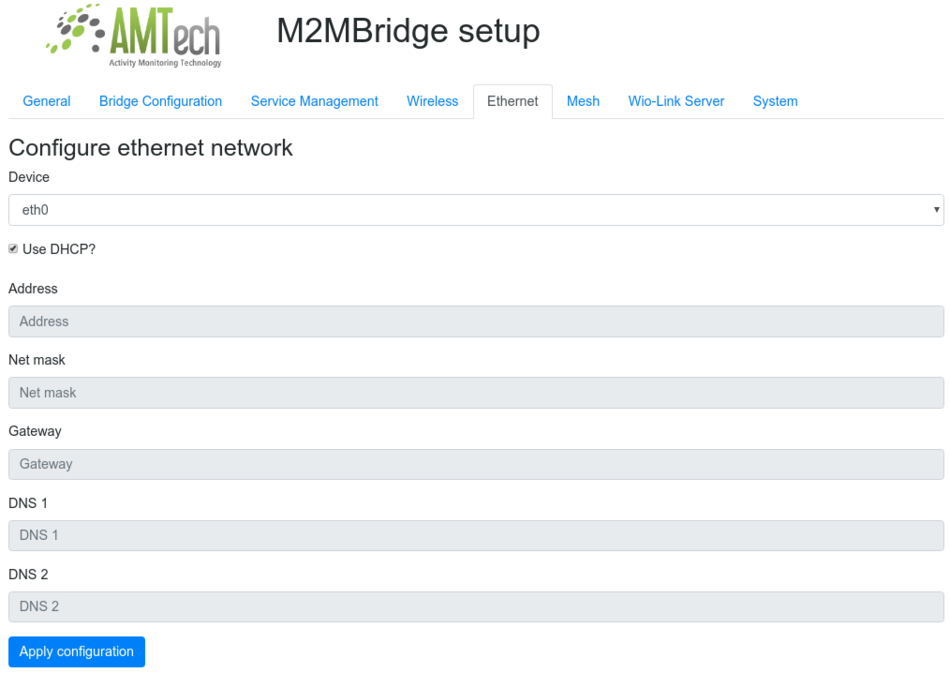
This section allows you to configure the wired ethernet interface of the Raspberry PI where the M2MBridge is running. You will be able to set the usual options for a network interface.
Mesh
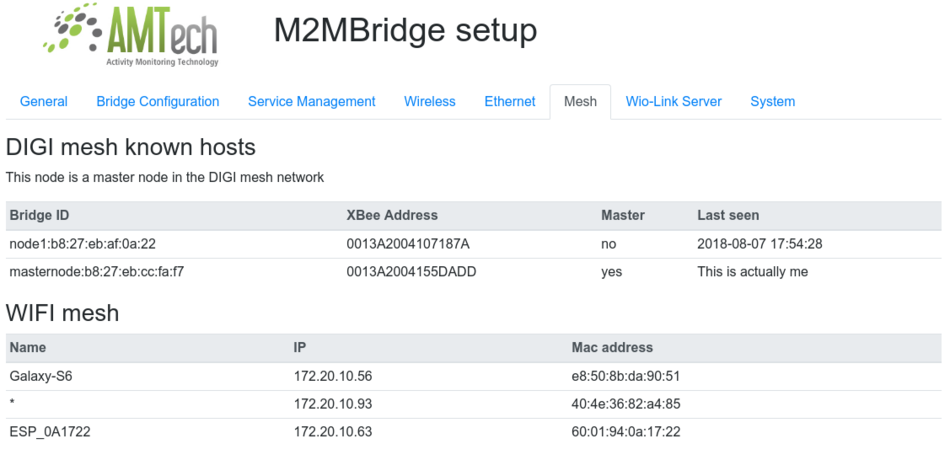
This section shows mesh network components including M2MBridges and end points. Wifi mesh shows assigned IP addresses by M2MBridge acting as AP Digi mesh shows thing's name , Digi radios ID for nodes and master of the mesh.
Wio
Through this page you will be controlling the Wio Server service and you will also be able to inspect the Wio Link/Node devices connected and configured. You can find more about configuring Wio Link/Node devices in this section.
The first time you visit this page you will only see a "Start service" button that will allow you to enable the Wio Server service.
Once you start the service you will see that the service is started but still you need top configure your Wio Link/Node devices pointing to this Wio Server. You can find more information about this configuration here.
After you have added one or more Wio Link/Node devices you will be able to check the API that is exposed by the already added sensors.
Through this page you can call the Restful API exposed by Grove sensors and devices allowing the validation of device's configuration and physical connections.
System
This section exposes several core system fucntions
Configuration validation
- At startup time the M2MBridge validates its configuration with the cloud. If there is an error, the application aborts
- To simplify the process of validation configuration there is an option to validate the configuration for a M2MBridge instance (See here)

