Difference between revisions of "Observers"
(→Activity observers) |
|||
| Line 118: | Line 118: | ||
= Activity observers = | = Activity observers = | ||
| + | == Selecting/Removing observation type == | ||
== Filters on observation fields == | == Filters on observation fields == | ||
== Binding properties == | == Binding properties == | ||
Revision as of 13:03, 17 May 2016
As seen before, it is possible to navigate among the things with the platform (see Tree editor). It is also possible to filter them according to some regular expression on their name and/or description.
We introduced the notion of Observer to allow to associate things of different types: for instance, to be able to retrieve the trucks and the clients of a company at the same time which allows to show them together in the map. As shown below, observers make also possible to filter with criteria on other fields than can be numerical, string, boolean and datetime.
More advanced constraints are available on the location and proximity area fields of the things. It is also possible to define criteria on aggregations of the things' snapshots.
Contents
Create observer workflow
Set observer name
Select thing type(s) or Observation type
- depends of observer type
Define logic criteria
- depends of types semantic
Execute it
- depend of observer type might need an observation instance to execute
Handling observers
Observers creation and loading
First thing to do is to open the observer's editor:
- The observer editor will appear over the navigator with its own menu bar on top of the page and another menu in the right side.
- When there is no observer loaded, the editor menu will look like
- Finally, the observer editor top menu will appear
Deletion and unloading
Click on ![]() to delete the currently loaded observer or just unload it by using the
to delete the currently loaded observer or just unload it by using the ![]() . The editor will return to its initial state:
. The editor will return to its initial state: ![]()
Also, if the observer was executed, and thus the things filtered, the editor will return the list of thing instances that matched the criteria
Adding/Removing thing types
In order to show things of different types at the same time you must load or create an observer. The thing types can be chosen with the button ![]() and once a type is selected the menu in the right will be updated
and once a type is selected the menu in the right will be updated
For instance, let us suppose we want to see all the Trucks and the endCustomers of a company. We click on the button once to select type Truck and once to select endCustomers.Then you can save the observer by clicking on buttonand the observer editor will look like this
Execute the observer with button
and the list of things will contain all the trucks and endCustomers the user has access to.
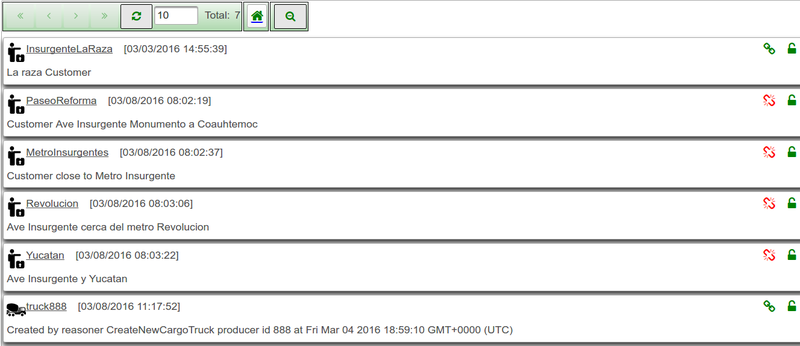
If a chosen thing type is no longer needed and it is wanted to be removed from the list, go to the right side menu, click on the thing type submenu and then click on the last option at the bottom ![]()
Note: Do not forget to save the observer if you want to keep your changes. If you execute it, a dialog window will allow you to save it or cancel the operation.
Execute observers
Filter criteria
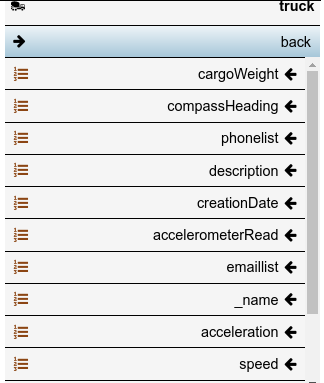
It is possible to filter the things to observe, by activating some constraints on thing fields. Selecting a thing type on the right-side menu, the list of fields that allow constraints will appear
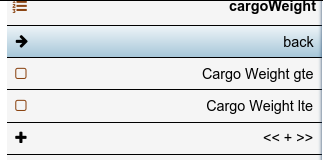
Choosing a field will show all the available criteria for this field
Then, click on one of the options to show the constraint editor in the center of the screen, below the observer menu. Set the contraint parameters in the corresponding spaces.
It is also possible to enable/disable a given constraint by unchecking the ![]() at the left of the field name.
at the left of the field name.
Note: All the constraints that are unchecked will be ignored in the saving process. However, their parameter values will stand in the client while the editor is active.
The constraint list will depend on the type of the field as it will be shown below. There are several basic constraints that correspond to base field types (numerical, text, datetime and boolean). There are also some advanced constraints and constraints on aggregation functions.
Basic constraints
The basic constraints correspond to the primitive field types and are given below
- numerical (long, integer and double)
- lte - lower than or equal
- gte - greater than or equal
- text
- regex - satisfies a regular expression
- eq - equals
- datetime
- lte - lower than or equal
- gte - greater than or equal
- boolean
- eq - equals
In order to edit a constraint, you should navigate on the right side menu from the thing type, to the field id and then to the constraint. The constraint caption will be the caption of the field and the operator which will be one of lte, gte, eq, etc.
Once you click on the corresponding menu,
Note: There is a special case for the field @id which contains the uri where the only constraint allowed is the equality and the caption of the constraint will be Uri
Advanced constraints
Our observers allow constraints for two special types: spatial or location and proximity area field.
Spatial fields
There are 4 constraints on the spatial field location of the resources: three correspond to spatial relation operators Within, Contains and Intersects and the other one is to find the closest resources. All of them depend on a given geometry that can be edited by the map or written directly in the constraint input box. Note that, when one of this constraints is selected, the map edition is enabled and the status is set to
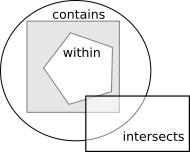
The contraints based on spatial relations are shown below according to a given gray rectangle:
- Within: accepts only those things which are within (or contained by) a given geometry (e.g. pentagon)
- Contains: accepts only those things containing a given geometry (e.g. circle)
- Intersects: accepts only those things which intersects the given geometry (e.g. white rectangle)
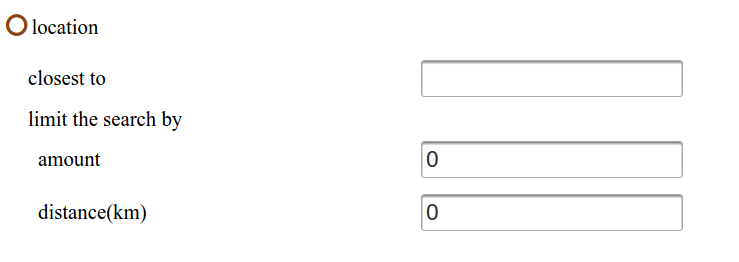
The other contraint allows to find the closest resources to a given point. When the given geometry is not a point, the center of the bounding rectangle is used. This constraint accept also two parameters to limit the vertices to retrieve: amount and maximum distance to the point. In both cases, the value 0 allows to remove the limits
Proximity area fields
The other special constraint represent a filter on the field proximity area. This constraint is called "with ancestor" according to the parent-child relation analogy explained here. Given a thing, it allows to filter those resources having it or one of its descendants as proximity area.
The desired ancestor can be chosen with the ![]() or it is possible to write the id directly in the input box.
or it is possible to write the id directly in the input box.
Consider the example of the shopping centerLet us suppose that every customer of the shopping center has its proximity area pointing to the business closest to its position by some sensors placed around the mall. So, for an observer returning customers, - if you choose a business id as ancestor, you will have in return all the customers that were detected the last time near (or inside) that business. - if you choose the level id as ancestor, you will have all the customers in that floor because they will be at a business having that level id as proximity area - if you choose Shopping center as ancestor, you will have all the customers having one of its business as proximity area, this means all the business pointing to a level which points to the shopping center
Aggregation functions
As described in Timeline view, each property of a thing type can be configured so several old values are kept in order to allow to see different versions of a given instance.
Activity observers
Selecting/Removing observation type
Filters on observation fields
Binding properties
Follower's observers and observers for API=
Observers API
https://<dapurl>/amtech/observersexec/<observeruri>[?params]
Available params:
-
observation: JSON string representation of the observation. May be mandatory depending on the requirements of the observer. -
resourceStatusFilter: You can specify this parameter with the valuevalidto only return things that passed validation. -
limit: Limit for the number of results. -
noOlderThan: Does not return results older than this date expressed as the number of milliseconds since the epoch (January 1st, 1970, 00:00:00 GMT) -
offsetDate: This works in conjunction withoffsetId. This is expected to be thecreation dateof the thing indicated with the paramoffsetId. -
offsetId: The results will start with the first thing that is older than the record with this ID. This works in conjunction with theoffsetDateand you should indicate either both or none of them. -
tenant: Only return those things available to this tenant. -
includeCount: Set totrueto indicate that we are interested in the total number of results for the execution of this observer.falseotherwise.
Target things
targetthings "[{\"thingType\":\"/amtech/linkeddata/types/composite/entity/truck\",\"thingsId\":[\"truck888\"], proximityarea}]" It allows to establish relations between an observation and things instances grouped by type including a proximity area. It offers a tool to resolve thing type instances. From client to server: It can be configured to used by observer to returns just target things instances. The proximityarea is used at the observation enrichment to assigned target things instances with a location. From server to client: Allows to send observations to specific instances. Example m2mBridge leverages this functionality to implement centralized management and send observations.


